Microsoft Bookings

Microsoft Bookings can reduce the scheduling burden on faculty by automatically creating online Teams appointments based on your schedule and availability. It requires some work to set up, but then students can select times that are convenient for you without dealing with the back-and-forth labor of scheduling coordination.

No more: "Are you free on Wednesday at 11:00am? No? How about 11:30am? 12:00pm? What about Thursday?"

Then once you found a time...

"Okay, I'll create the meeting invite when I have time and email you the link... if I remember."

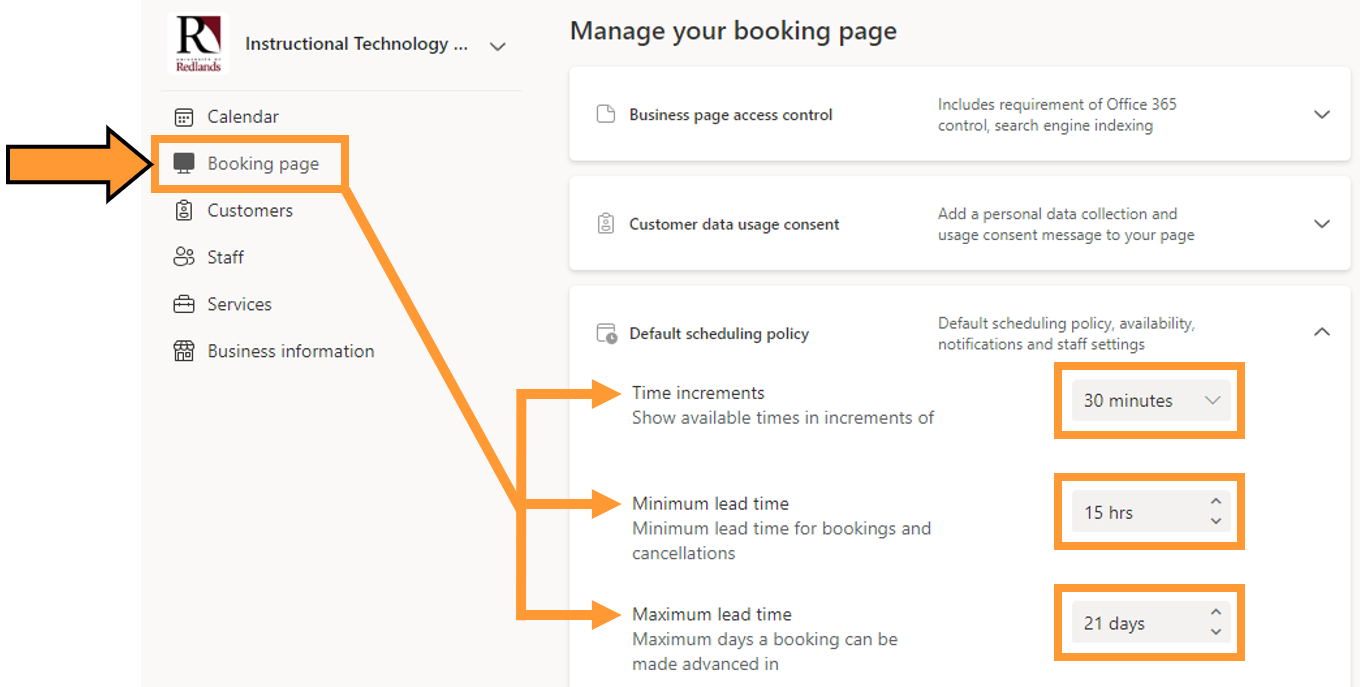
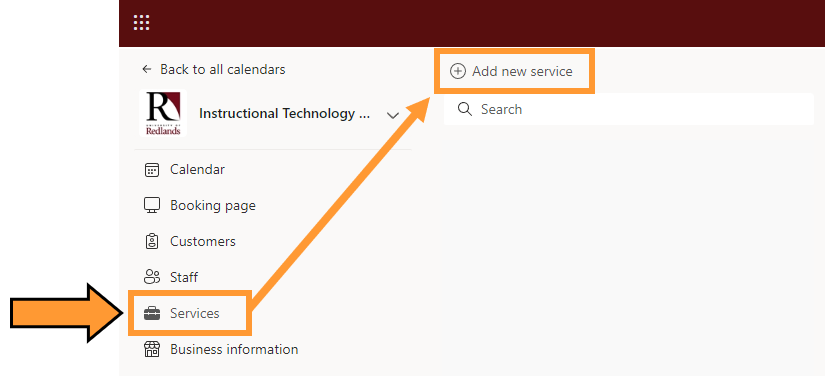
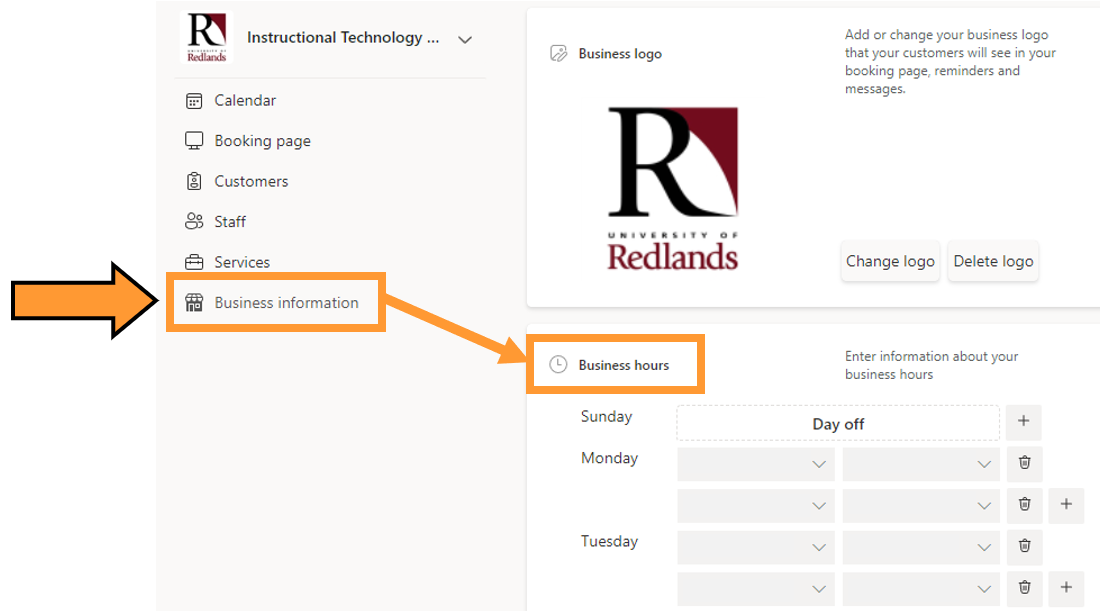
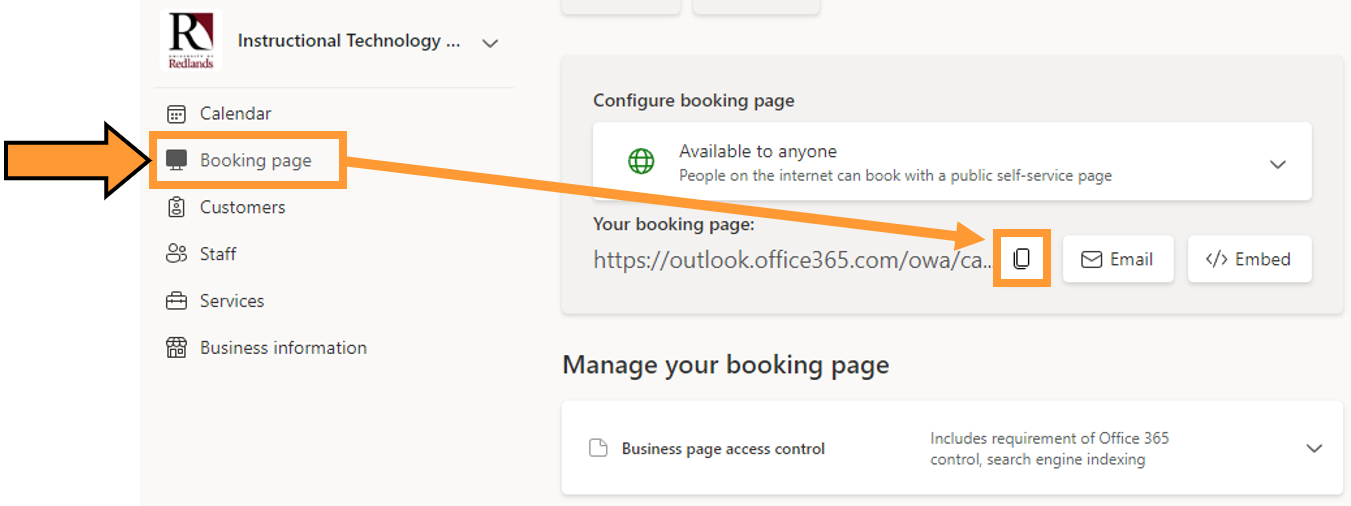
To setup and create your own calendar:

  1. Go to https://outlook.office.com/bookings/homepage
  2. Name your company something like “Mary Smith’s Office Hours”
  3. Under the Booking Page tab, change your Default Scheduling Policy.
    Bookings 3a - Default Scheduling Policy.PNG
  4. Under the Services tab, click Add New Service.
    Bookings 3b - Services.PNG
  5. Under the Business Information tab, set your availability/office hours.
    Bookings 3c - Business Information.PNG
  6. Click Save and Publish.
  7. Under the Booking Page tab, click the Copy URL button to share your new Bookings page. You can add the link to your email signature, your Canvas course, or post it to your class in Teams.
    Bookings 3d - Copy Page URL.PNG